为列表-明细应用构建明细视图
学习目标
为列表-明细应用构建明细视图。
为列表-明细应用实现视图
在实现概览页面之后,我们希望实现明细页面。明细页面应显示从列表页面中所选承运人的详细信息,此外还应显示该承运人的航班和连接。该页面应如下图所示,并可通过使用 sap.uxap.ObjectPageLayout 来实现。
观看此视频,了解更多有关明细视图中使用的 sap.uxap.ObjectPageLayout 控件的结构。
视频:本节含 SAP 官方视频(视频 ID
1_mcnl07us),需在 learning.sap.com 在线观看。
用例
如果满足以下情况,请使用 ObjectPageLayout:
用户需要查看、编辑或创建某个项目及其所有详细信息。
用户需要获取对象的概览,并与对象的各个部分进行交互。
实现示例
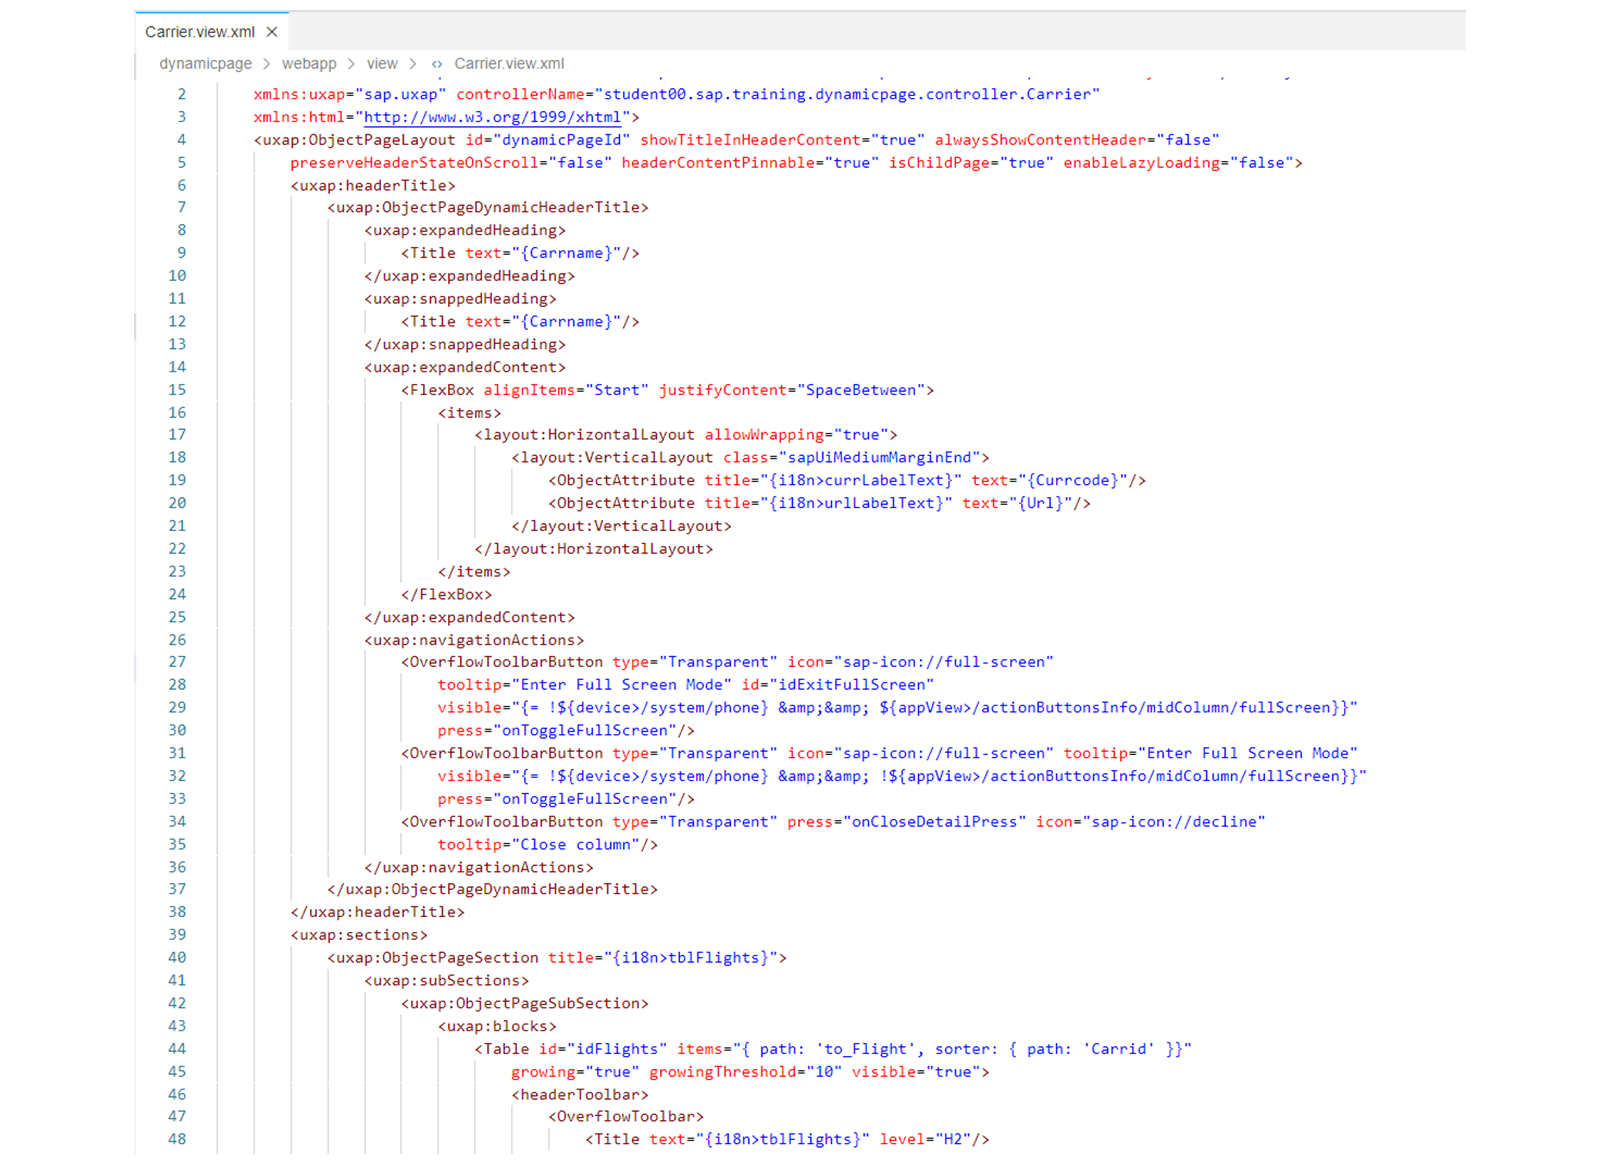
该图展示了 Carrier 视图实现的部分内容。您可以看到聚合 headerTitle 和 sections 的实现。
为列表-明细应用构建明细视图
业务示例
在本练习中,您将为应用程序定义明细视图内容。该视图应使用 sap.uxap.ObjectPageDynamicHeaderTitle 元素和 sap.uxap.headerContent 聚合来显示所选承运人的详细信息。将要实现的表显示所选承运人的可用航班。
注意
SAP Business Technology Platform 及其工具属于云服务。由于云软件的特性,步骤流程以及字段和按钮的命名可能与练习解决方案有所不同。
前提条件
您需要先完成上一个构建列表视图的练习。
步骤
打开
*Flights.view.xml*文件,并添加命名空间sap.uxap,其 XML 别名为ux。按如下方式更新代码:
<mvc:View controllerName="student.com.sap.training.advancedsapui5.listdetail.controller.Flights"
xmlns:mvc="sap.ui.core.mvc" displayBlock="true"
xmlns="sap.m"
xmlns:l="sap.ui.layout"
xmlns:ux="sap.uxap">
</mvc:View>
向视图添加一个
sap.uxap.ObjectPageLayout元素。添加属性id,其值为objectPageLayout。在
View定义的开头添加以下代码:
<ux:ObjectPageLayout id="objectPageLayout">
</ux:ObjectPageLayout>
向
sap.uxap.ObjectPageLayout控件添加sap.uxap.headerTitle、sap.uxap.headerContent和sap.uxap.sections聚合。在
ObjectPageLayout元素内添加以下代码:
<ux:headerTitle>
</ux:headerTitle>
<ux:headerContent>
</ux:headerContent>
<ux:sections>
</ux:sections>
向
headerTitle聚合添加一个sap.uxap.ObjectPageDynamicHeaderTitle控件。为属性id添加值objectPageDynamicHeader。在
headerTitle元素内添加以下代码:
<ux:ObjectPageDynamicHeaderTitle id="objectPageDynamicHeader">
</ux:ObjectPageDynamicHeaderTitle>
向
sap.uxap.ObjectPageDynamicHeaderTitle控件添加sap.uxap.expandedHeading聚合。在
ObjectPageDynamicHeaderTitle元素内添加以下代码:
<ux:expandedHeading>
</ux:expandedHeading>
向
sap.uxap.expandedHeading聚合添加一个sap.m.Title控件,并使用列出的属性和值。
sap.m.ObjectAttribute 元素的属性-值对
属性 |
值 |
|---|---|
id |
|
text |
|
level |
|
在
expandedHeading元素内添加以下代码:
<Title
id="fltitle"
text="{Carrname}"
level="H2"/>
现在,
headerTitle部分应如下所示: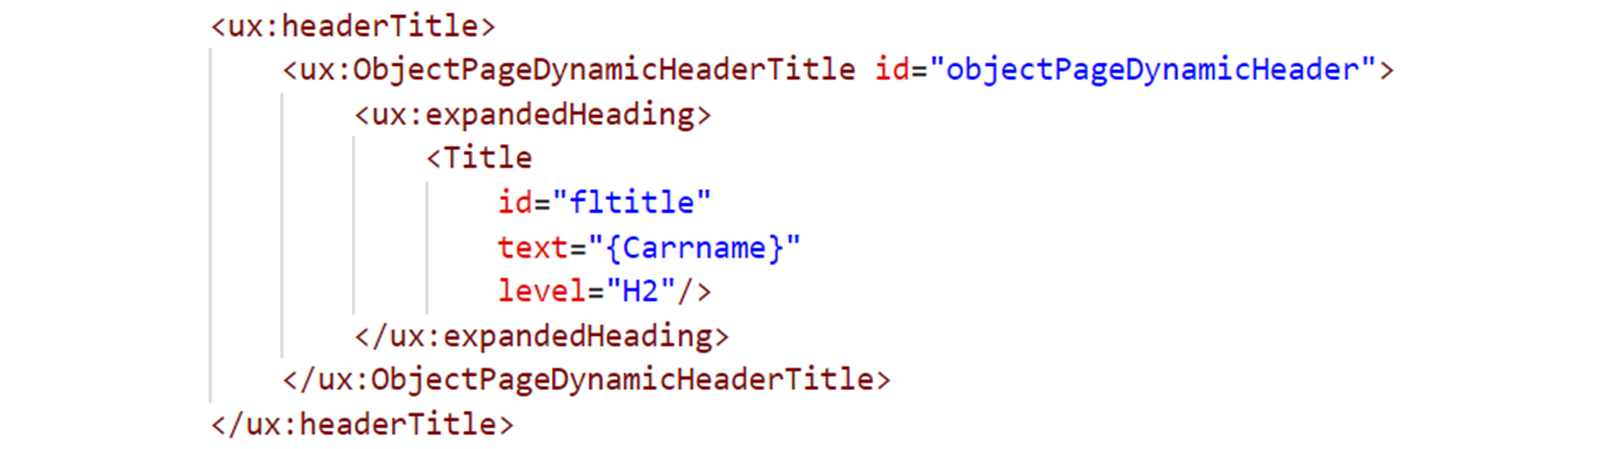
向
sap.uxap.headerContent添加一个sap.m.FlexBox控件,并使用列出的属性和值。 | 属性 | 值 | | --- | --- | | id |flexbox| | wrap |Wrap|在
headerContent元素内添加以下代码:
<FlexBox wrap="Wrap" id="flexBox">
</FlexBox>
向
sap.m.Flex控件添加一个sap.f.Avatar和一个sap.ui.layout.VerticalLayout控件,并使用列出的属性和值。 | 元素 | 属性 | 值 | | --- | --- | --- | | 1 | id |avatar| | src |sap-icon://flight| | | 2 | id |verticallayout1| | class |sapUiSmallMarginBeginEnd| |在
FlexBox元素内添加以下代码:
<Avatar id="avatar" src="sap-icon://flight"/>
<l:VerticalLayout id="verticalLayout1" class="sapUiSmallMarginBeginEnd">
</l:VerticalLayout>
向
sap.ui.layout.VerticalLayout控件添加两个sap.m.Label控件,并使用列出的属性和值: | 元素 | 属性 | 值 | | --- | --- | --- | | 1 | id |label1| | text |{Carrid}| | | 2 | id |label2| | text |{Url}| |在
VerticalLayout元素中添加以下代码:
<Label id="label1" text="{Carrid}"/>
<Label id="label2" text="{Url}"/>
现在,
headerContent的代码应如下所示: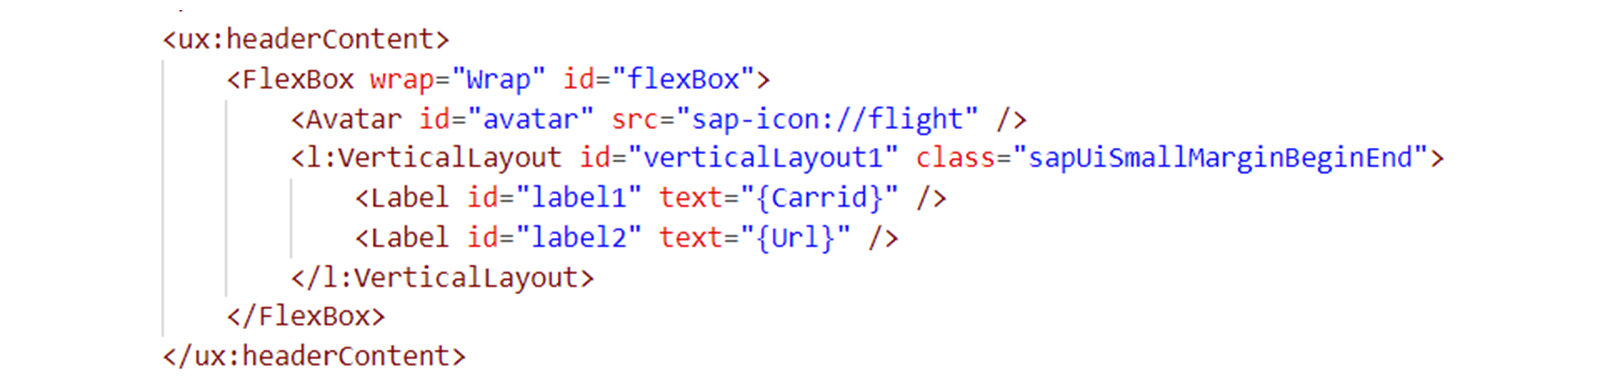
向
sap.uxap.sections聚合添加一个sap.uxap.ObjectPageSection控件。为属性id添加值objectPageSection。在
sections元素内添加以下代码:
<ux:ObjectPageSection id="objectPageSection">
</ux:ObjectPageSection>
向
sap.uxap.ObjectPageSection控件添加一个sap.uxap.ObjectPageSubSection控件。为属性id添加值objectPageSubSection。在
ObjectPageSection元素内添加以下代码:
<ux:ObjectPageSubSection id="objectPageSubSection1">
</ux:ObjectPageSubSection>
将
sap.m.Table控件剪切并粘贴到sap.uxap.ObjectPageSubSection聚合中。将 table 元素及其内容剪切/粘贴到
ObjectPageSubSection元素内:
<Table id="idFlights" items="{path: 'to_Flight', sorter: {path: 'Carrid'}}"
mode="SingleSelectMaster"
growing="true"
growingThreshold="10">
[...]
</Table>
删除剩余的 Page 元素及其内容。
删除 Page 元素的其余代码:
<Page id="idFlightsPage".....
...
</Page>
结果
您暂时还无法测试明细视图。您需要先完成下一个有关视图同步的练习。